Delinquent Croissant

This sentence no verb.

About Me

My Photo
Name: Sami
Location: New York, New York, United States

View my complete profile

Archives

  • September 2005
  • October 2005
  • November 2005
  • December 2005
  • January 2006
  • May 2006
  • June 2006
  • July 2006
  • August 2006
  • October 2006
  • November 2006
  • December 2006
  • January 2007
  • February 2007
  • March 2007

BLOGS I READ

Click here to see my blogroll

KNITTERLY PUBLICATIONS

Knitty
The Anti-Craft
MagKnits
Spun Magazine

FREE GOODIES

Kyoto Fair Isle hat
Nathalie convertible hat/beret
Pemaquid Hat
Moss Stitch Cloche in Big Wool
Cloche Recipe
My desktop wallpapers
Meandering Lattice Hat Pattern
Diminishing Braids Hat Pattern
Bobble Thing Hat Pattern
Glaistig Hat Pattern
Wavelet Hat Pattern
Three scarf patterns using Manos

READER KNITS

Meg's Diminishing Braids
Sabine's Glaistig
meegiemoo's Wavelets
Christy's Wavelet
Subhuman Superwoman's Meandering Lattice

Powered by Blogger

Subscribe with Bloglines

Saturday, March 03, 2007

Yay! It's March!

I'm back! I still haven't written up any patterns yet, but I have been knitting. Starlight is now 32 rows past the joining of body and sleeves. Not much progress, but any progress is good.

Here are some pics of the Large Lattice cabled hat (too long for the mannequin, of course, but it fits me just fine):


And here is a hat made from 2+ skeins of some lovely Noro Silk Garden (color #84) that Glaistig traded me for the Pemaquid hat:


(Why yes, I do regret letting The Wibbles play with my poor, now-noseless mannequin.)

The entire hat is double-knitted, on a size 5 circular. I started with 240 stitches, decreased fairly rapidly to 180 to make the brim, and then continued straight up to the crown. I decreased 20 stitches every 3 rounds (that sounds like a lot, but remember it's double knitting, so it's really like 10 stitches) until I had 20 stitches left, then did a k2tog around, then closed it up. The brim was kind of floppy, so I stuck some millinery wire in there. It could also use a blocking, which I will do later tonight.

I really want to make another one of these! I got some mossy green semisolid Koigu Kersti for another try. This time I want to make more of a cloche shape, with less of a brim. I will also try casting on to the millinery wire instead of threading it in afterwards, because it was a b*tch and a half to get that wire in there.

Labels: FOs, Hats, Starlight

posted by Sami @ 3:23 PM  8 comments

Monday, February 12, 2007

I Hate February

I do asset-liability management. If you don't know what that means, don't bother looking it up; it's boring number-crunchy kind of stuff. All my assessments and reports and whatnot are due March 1, so I don't get to do much in February (or January, really, but especially February) besides work.

I have knit a total of 6 rows on Starlight since the last photo I posted. So much for my wear-it-on-Valentine's-Day goal.

I still haven't written up the pattern on the short-rows hat.

I designed two new stitch patterns, both involving ribbing and cables (although not reversible). The first one is small, with an 8 stitch and 12 row repeat:


I started a hat with this stitch pattern, but it became clear early on that it was way too big, so I frogged it. I'll try again, with fewer repeats, when I have time (hah!).

The second stitch pattern is huge: 32 stitches and 40 rows for one pattern repeat.
(click to make bigger and actually be able to SEE it)


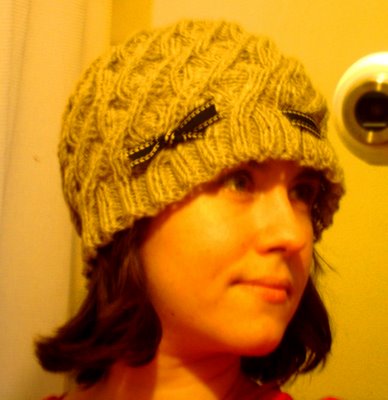
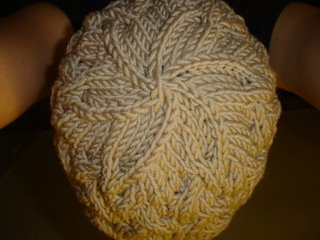
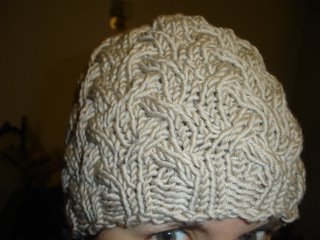
I actually managed to make a successful hat with this second pattern! I used beige merino wool (Zara) on size 4 needles. I even managed to come up with crown decreases that blend in with the stitch pattern, which I should probably write down soon before I forget.

I'm debating whether or not to write up this pattern, since I'm not sure anyone other than me can use it. I've noticed one thing that happens almost all the time when other people knit my hat patterns - they leave out one or more row repeats before starting the decreases. Although my head is only slightly larger than average, it is apparently freakishly tall. This is confirmed by my mannequin. The circumference of the hat fits her perfectly (it's very stretchy and should fit just about anyone), but lengthwise it's pretty bad. Bad as in, it covers her ENTIRE FACE. However, you can't just leave off a row repeat if it's 40 rows. Even half a repeat (the decreases would still blend) is 20 rows. So I'm not sure if it can be adjusted for normal heads. It might be worth trying a heavy worsted yarn and leaving off one stitch repeat and one row repeat. Or using a thinner yarn, with a smaller needle, and adding a stitch repeat but leaving the row count alone. I'm not sure. Hopefully I'll get a chance to take some photos of the hat this week. If there's interest, I will write up the pattern exactly as it was knit, and feel free to experiment to get your size.

Labels: Hats, Starlight

posted by Sami @ 3:57 PM  3 comments

Saturday, February 03, 2007

A Few FOs

Firstly, the short rows hat worked! I haven't written up the pattern yet - I have my scribbled notes, but I want to add one or maybe two more size options. But here's a sneak peek (sorry for the blurry):

It's easier to tell from the non-modeled photo how the crown is slanted toward the back of the head:


Next are two recipe cloches:


My new favorite closures for the recipe cloches are these rhinestone buckles I got at Les' Bon Ribbon.

The black one is for my cousin Megan. It's a 2x2 rib brim, and the main stitch pattern is "Chunky Rib Pattern" on p.170 of the Readers' Digest stitchionary. I did one and a half repeats of the pattern, ending on a 2x2 rib round. The crown decreases are 8 stitches decreased per round, in a spiral, in 2x2 rib. The yarn is Rowan Kid Classic, color Smoke. I used about one and a third skeins for both the hat and the band. The hat is 144 stitches cast on, using a size 3 needle. The band is 3 stitches cast on, then 1x1 rib, also with a size 3 needle.

The green one is for the fall collection. The ribbon looks a bit loose on the mannequin, because I sized it on myself. This one is three repeats of Barbara Walker's "Wickerwork" stitch pattern (from the Second Treasury), with a 2x2 rib brim and an 8-section spiral decrease in stockinette for the crown. The ribbon is 7/8" wide grosgrain. I cast on 96 stitches for this hat, and used a size 7 needle. The yarn is Jo Sharp Silkroad Aran (I love this yarn, BTW), color #106 "Batik," just under 2 skeins.

Labels: FOs, Hats

posted by Sami @ 3:25 PM  6 comments

Monday, January 29, 2007

In Search of Lost Time: Short Rows

I wanted to talk a bit more about my short rows ideas (this was not clear from my Ideas post, but I have two separate ideas involving short rows). I’m finding it very interesting how some of my designs just work perfectly on the first try, as if by magic, and others make their way into the world over a period of years, leaving many failed attempts in their wake. I wonder, do other designers experience this also? Or are the "slow" designs just a result of my ideas being way ahead of my knitting ability?

In the first short rows idea, the short rows all occur over the same stitches, making the front of the hat significantly taller than the back. This results in a cloche shape, with the top of the crown toward the back of the head rather than centered on top of the head. In the second idea, the short rows occur "randomly" throughout. I say “randomly” because, although it appears random, it's actually arranged so that after a given number of short row segments have been completed, the same number of rows have been worked for each stitch in the round.

My first try was Idea 2, in Zara. It starts with a ribbed band, as did all my hats at the time. The short row sections are in stockinette, with one strand of burgundy held together with one strand of lilac. Between the short row sections, I knit a few rounds in reverse stockinette, with two strands of burgundy held together. This hat was not actually a total failure; it was just kind of mediocre. I probably would have posted about it, but I wasn’t blogging yet. It fits well (at the time, it was actually my best-fitting hat – I was having some serious size issues back then). The biggest problem with this hat is the colors. I used one MC + one CC (instead of 2 CC) for the reverse stockinette bands on purpose, because I thought it would obscure the little jog that occurs where you switch to reverse stockinette. It does obscure the jog, but the whole thing just looks kind of, um, muddy. And, I no longer care about jogs. You can’t really get around them in circular knitting, so I’ve learned to just accept them. Another, more minor problem is that I continued with the short row sections for too long, then did a final band of reverse stockinette, followed by some very fast decreases in stockinette. Due to the decrease speed, the last band of reverse stockinette puckers a bit.

Second try: Idea 2 again, in camel and grey Margrite Bulky. After a ribbed band, everything is in stockinette stitch. The short row sections are in the grey. The ribbed band, and the rounds between each short row section, are in the camel. Problem 1: There is not enough contrast between the two colors, so the camel bands do not stand out enough against the grey background. Problem 2: The hat is ginormous. Biggest problem: My short-rowing technique is awful, and you can see little puckers and/or holes where the wraps were picked up. I wonder why that didn’t happen with my first try. I’m assuming it has something to do with using two strands held together.

Third try: Idea 1, in grey Misti Alpaca Chunky. The entire hat is in garter stitch. Minor problem: I didn’t know yet about the alpaca issue, so although the hat fit perfectly right after I made it, it quickly became too big. (I did manage to wear it twice before it grew.) Major problem: Since garter stitch was used throughout, the short row sections don’t stand out AT ALL. It may as well be a plain old garter stitch hat. The good news is that my short rows don’t look bad in garter stitch.

Fourth try: Idea 1 again, in brown Ribbon Twist. I figured I’d get around the Major Problem by knitting the short row sections in garter, as before, then doing the crown decreases in stockinette. This idea may have worked, had I been a better knitter at the time. However, I grossly miscalculated the point at which the crown decreases should begin. Newbie that I was, I figured I could fix that by decreasing more slowly. Result? The hat comes to a very pointy point on top, and looks like a Hershey’s Kiss. (It certainly doesn’t help that it’s brown.)

Fifth try: Back to Idea 2. Cashmerino Aran. (Side note – you can tell how surprised I was by all these failures, by the quality of the yarn I was using. Nowadays, when I try out low-confidence ideas, I use cheap yarn!) I decided to use garter stitch for the whole hat, so I wouldn’t have short row issues. I decided to use black and white, so I wouldn’t have contrast issues. I did the short row sections in black, with a few rounds of white in between. This idea may also have worked, had I been a better knitter. When you knit garter stitch in the round, you have to knit one round then purl one round. You get a subtle “seam” at the end-of-round, where you switch between the two. If you don’t pull the first couple of stitches of each round tight, you can get some gapping at the “seam,” which is a Bad Thing. There are also some tension issues when you are switching colors with several rounds between switches, and carrying the yarn up rather than breaking it. These two things combined completely overwhelmed me, and my “seam” was Gap City. With Puckerville in the suburbs. Also, I didn’t really like the color jogs - they were very noticeable due to the high color contrast.

Sixth and current try: I’m back to Idea 1. I’m using a skein of Noro Kureyon that I had in my stash. I’m doing the short row sections in garter stitch, with a few rounds of stockinette in between. Due to the self-striping, the short rows would have been visible (albeit in a more subtle way) even without the stockinette breaks, but I like them anyway (and besides, I could make another one in a solid yarn and it would still work). I’ve been trying the hat on as I go, and it fits. The short rows look good. The stitch jog (aka the garter “seam”) is very subtle and does not bother me. Using one yarn means no color jogs and no gapping problems. Last night I believed I was headed directly for success and then BLAMMO! I ran out of yarn. But it’s Kureyon! So I can get more, without worrying about matching the dyelot (or even the colorway, for that matter – anything that has a significant amount of either black or grey in it should work)! I’ll be off to the LYS this afternoon. Of course I can’t say “success” until the hat is actually off the needles, given my history of crown decrease nightmares, but it’s looking pretty good. I think I’ll buy 2 skeins, so I can take a similar stab at Idea 2 when this hat is finished. Time Regained!

Labels: Hats

posted by Sami @ 11:26 AM  2 comments

Saturday, January 27, 2007

Kyoto


As I said before, I luuurve this hat.

I made up 2 extra sizes for the pattern, since size appears to be important - it fits me well, but is obviously too big for the mannequin. However, be warned that only the large size has been tested out.

The decreases may look slightly different for the smaller sizes, but should still look pretty much like this:


I definitely recommend wet blocking this hat; it was a bit puckery in places before the blocking. I didn't pin it out or anything, though - I soaked it in tepid water and Eucalan for about 10 minutes then put it on the mannequin head to dry.

Yarn
Debbie Bliss Donegal Tweed Aran (100% wool; 88m per 50g ball):
One skein color 281101 black (MC)
One skein color 281706 natural (CC)

I like this quality, but the black tweed has natural flecks and the natural tweed has black flecks. Sometimes, at first glance, this may make it look like you've made a mistake:

If that bothers you, I would consider a yarn substitution. I wonder if something like Cashsoft Aran would knit up to the same gauge.

Other Materials
Size 7, 47" Addi Turbo circular needle (as usual, I recommend Magic Loop)
Tapestry needle for weaving in ends
8 stitch markers; one different from the rest

Measurements
Gauge: 17.5 stitches and 22.5 rows to 4", after washing and blocking.
Circumference: 18"[20", 22"] for sizes S[M,L], unstretched.

Abbreviations
CDD (centered double decrease): Slip 2 stitches together as if to knit, k1, pass the 2 slipped stitches over
K1CC, for example, means knit 1 stitch with CC. Similar meanings for K1MC, P1CC, P1MC, P2MC, P3MC, and CDDCC.

Kyoto Rib
Worked in the round over a multiple of 4 stitches.
Make sure that both yarns are held to the BACK when changing colors.
Rounds 1-3: *K1CC, P1MC, repeat from * around.
Round 4: *K1CC, P1MC, K1MC, P1MC, repeat from * around.
Rounds 5-7: *K1CC, P3MC, repeat from * around.
Round 8: *K1CC, P1MC, P1CC, P1MC, repeat from * around.
Rounds 9-11: Same as rounds 1-3.
Round 12: *K1MC, P1MC, K1CC, P1MC, repeat from * around.
Rounds 13-15: *P2MC, K1CC, P1MC, repeat from * around.
Round 16: *P1CC, P1MC, K1CC, P1MC, repeat from * around.
Repeat rounds 1-16 for pattern.

Hat
With MC, cast on 80[88,96] stitches (I used the alternate cable cast-on). Work a setup row: K1CC, P1MC across. Join into a round, being careful not to twist. Use the distinct stitch marker to mark the end of the round. Work in Kyoto Rib until hat measures 5.5"[5.5",6"] tall (or desired length - the 6" length just covers my ears). Be sure to end on either Round 8 or Round 16 of the pattern.

Work marker round, following Round 1 of the stitch pattern: *Work 11[11,13] stiches, place marker, work 9[11,11] stitches, place marker, repeat from * around (omit the last "place marker," since the end of round marker will already be there).

Begin crown decreases:
"Work stitch in pattern" means that if the next stitch is a CC knit stitch, then K1CC. If the next stitch is a MC purl stitch, then P1MC. Half the time on the row after a CDDCC, you will need to K3CC. (The other half, will be P1MC, K1CC, P1MC.)

Size L only: *Work 5 stitches in pattern, CDDCC, work 5 stitches in pattern, slip marker, work 11 stitches in pattern, slip marker, repeat from * around - 88 stitches remain.

Sizes M and L only: *Work 11 stitches in pattern, slip marker, work 4 stitches in pattern, CDDCC, work 4 stitches in pattern, slip marker, repeat from * around - 80 stitches remain.

All sizes continue here:
*Work 4 stitches in pattern, CDCC, work 4 stitches in pattern, slip marker, work 9 stitches in pattern, slip marker, repeat from * around - 72 stitches remain.
*Work 9 stitches in pattern, slip marker, work 3 stitches in pattern, CDDCC, work 3 stitches in pattern, slip marker, repeat from * around - 64 stitches remain.
*Work 3 stitches in pattern, CDDCC, work 3 stitches in pattern, slip marker, work 7 stitches in pattern, slip marker, repeat from * around - 56 stitches remain.
*Work 7 stitches in pattern, slip marker, Work 2 stitches in pattern, CDDCC, work 2 stitches in pattern, slip marker, repeat from * around - 48 stitches remain.
*Work 2 stitches in pattern, CDDCC, work 2 stitches in pattern, slip marker, work 5 stitches in pattern, slip marker, repeat from * around - 40 stitches remain.
*Work 5 stitches in pattern, slip marker, Work 1 stitch in pattern, CDDCC, work 1 stitch in pattern, slip marker, repeat from * around - 32 stitches remain.
*Work 1 stitch in pattern, CDDCC, work 1 stitch in pattern, slip marker, work 3 stitches in pattern, slip marker, repeat from * around - 24 stitches remain.

From here on, all stitches will be in CC only.

*K3, slip marker, CDD, slip marker, repeat from * around - 16 stitches remain.
*CDD, slip marker, K1, slip marker, repeat from * around - 8 stitches remain.

Cut CC yarn, leaving a tail. Thread the tail through remaining stitches and pull tight to close. Cut MC yarn also. Weave in ends.

I will end with a bonus innards shot:

Labels: FOs, Hats, Kyoto

posted by Sami @ 12:46 PM  2 comments

Wednesday, January 24, 2007

Ideas

It always feels like I have way more hat ideas than I have time to try them out. Trying out an idea is a big investment for me, because

a) they often don't work out (I have many, many hats that I've finished but never posted about, because I consider them unsuccessful), and even though I do gain information from a failed idea, it's still a lot of time and yarn spent on pretty much nothing, and

b) I have very limited knitting time, and - particularly this year - things that I need (OK, want very badly) to get finished. Like my hat collection.

However, when I get an idea it tends to plague me mercilessly until I try it out. I am currently being plagued by a host of ideas, so I thought I'd temporarily appease the Furies by posting about them, since I can't knit them anytime soon.

1. Felting/fulling. I have a two-color Fair Isle stitch pattern I made up that looks like zebra print. I would love to try a felted cloche using this stitch pattern. Unfortunately, this is the last thing I would ever try, since it would be my first felting attempt and pretty much a certain disaster.

2. Earflaps. This idea is not plaguing me too badly, so I'll probably leave it alone for a while.

3. SHORT ROWS. This baby has had its claws in my back ever since I bought Loop-d-loop and saw that short row Fair Isle pullover. I already have several unsuccessful experiments under my belt, so I have pretty low confidence with this idea. However, the plague factor is extremely high, so I will try again. This is one that I probably won't let go until I make it work. Especially since most of the problems seem to come from my crappy technique rather than my actual ideas. Eventually I'll be a good enough knitter for this idea!

4. "Freeform" hat made out of a bunch of knitted flowers made separately and then sewn together. Low confidence factor + low plague factor = not anytime soon.

5. High-confidence idea: More Recipe Cloches! There are stitch patterns I know will work (Wavelet, certain ribbing variations, etc.) - some of these are already in progress and some are on my short list. There are some other stitch patterns where I'm not quite sure how to do the decreases and/or the eyelet round (knot-type stitches, or this one stitch pattern I've got a hankering to try where you just cast on an odd number of stitches and keep doing right twists until the thing is done). Those are of course lower-confidence and will have to wait. (I've actually got a few failed twisty-all-over hats. I've tried some different things for the decreases and they all look terrible.)

6. Colorwork. This is pretty low-confidence in general, although the plague factor is pretty high so we'll see. I've never attempted intarsia or mosaic knitting, and my few attempts at Fair Isle have had very wonky tension. However, the Kyoto hat came out really well, so I just might try some of the very simplest FI patterns, where you change color pretty much every stitch like in Kyoto - the tension doesn't suffer as much when the floats are short. In particular, I have one idea for a hat that is entirely 2x2 corrugated ribbing. Two colors per round, but there are color changes throughout, so six colors for the whole hat. I've already ordered the Spindrift - when I receive it I'll probably cast on right away.

7. I-cord hat. This one requires two colors of the same yarn, and a head form (I've got my Styrofoam mannequin). With MC, knit a super-long I-cord. Pin it onto the head form, starting at the top of the crown, into a big spirally hat shape. With CC, slip stitch crochet the thing together, removing the pins as you go. Medium confidence, medium plague factor - maybe I'll get to this one after some recipe cloches and the corrugated ribbing hat.

8. The Frankenhat. High confidence, but low plague factor. I should do this one, though, because I think it will look cool. It's basically a plain stockinette hat, but in random places a random number of stitches would be bound off and then re-cast on the following round, creating what amount to large, various-sized buttonholes all over the hat. These "buttonholes" would then be stitched shut on the right side in a contrasting color, using a very noticeable stitch, kind of like Frankenstein scars.

9. My last idea is the Turban. I've got a neckwarmer I made out of Classic Elite Montera. It's 48 stitches, and three repeats of a giant ribbed cable. (Every row is 2x2 rib, and every 23rd row the center 40 stitches are cabled.) I used a provisional cast-on, and grafted the two ends together to make the neckwarmer. I never posted about it (or wear it) because my grafting was really, really bad. However, it fits very nicely on my head and (except for the fact that it has no top) it looks just like one of those early 20th century turban-style hats. Now that I've got that finishing class under my belt and can graft properly, I'm thinking I could make another one in Manos, then pick up stitches for the crown to make a proper hat.

Labels: Hats

posted by Sami @ 4:05 PM  3 comments

Tuesday, January 23, 2007

Kyoto is finished!

The black and natural Donegal Tweed hat from the previous post has been finished (including a wet block) and I luuuurve it! Photos have been taken; they and the pattern will be posted this weekend (also, somewhat longish post on ideas is coming tomorrow).

Unfortunately, I had to take the Kyoto pics on the mannequin (for whom the hat is a bit too big), since I couldn't get a decent shot of myself. I look like crap lately due to work stress and lack of sleepage. My husband recently decided to take up snoring as if it were some kind of freakin' competitive sport or something. Maybe I should try smile therapy.

Labels: Hats, Kyoto

posted by Sami @ 3:01 PM  2 comments

Saturday, January 20, 2007

Weekend Update

1. Starlight
Body and sleeves are ready to be joined! Progress photo of the giant blob coming next weekend.

2. Heatherly's hat
After browsing through her blog, I decided to go with the colorful hat rather than the neutral one. And, it's finished! It will go in the mail on Monday. I've taken photos, but I won't post them until after she receives it.

3. WIP's
Here's an in-progress shot of the super-girly hat I posted about a while ago:

The burgundy stuff is waste yarn; I haven't decided what I'm going to do with the brim edge yet. Also, the color in this photo is completely untrue; it's really more of an emerald green.

And, after finishing Heatherly's hat, I couldn't resist casting on for the rejected idea:

The stitch pattern is my own invention, a hybrid of Corrugated Ribbing (this has been lodged in my brain ever since Anemoi Mitten Fever took over the blogworld) and a diminished (to steal a term from music theory) version of the Chunky Rib Pattern on p.170 of the Readers' Digest stitchionary.

ETA: The yarn is Debbie Bliss Donegal Tweed Aran. I find it very similar to Rowan's Yorkshire Tweed Aran, although it is very slightly thinner and has a bit more in the way of tweedy flecks. I like the way the black has natural flecks and the natural has black flecks, making the pattern look slightly imperfect.

Labels: Hats, Kyoto, Starlight

posted by Sami @ 12:00 PM  4 comments

Friday, January 19, 2007

Nathalie Convertible Hat

Worn as a beret:


And as a hat:

Yarn: Muench Naturwolle, 2 skeins. I can't remember the name of the colorway, and I lost the ball bands.

Needles: Size 9 and 10 47" Addi Turbos.

Pattern:
With #9, CO 60 stitches using the alternate cable cast-on. Join into a round and work in k1, p1 ribbing for 3.5". Switch to larger needle and work one more round of ribbing. Work increase round: Kfb into each P stitch - 90 sts total. Work k2, p1 rib for 3 rounds. Increase again: Kfb into each of the second knit stitches - 120 stitches. Work in k2, p2 rib for 3-3.5". Decrease: (K2, p2, k2, p2tog) around - 105 sts total. Work in patt for 3 rounds. Decrease again - (K2, p2tog, k2, p1) around - 90 sts total. Work in patt for 3 rounds. Decrease: (K2, p1, k2tog, p1) around - 75 sts. Work in patt for 3 rounds. Decrease: (K2tog, p1, k1, p1) around - 60 sts. Work in k1, p1 rib for 3 rounds. Commence final decreases: Divide sts into 6 groups of 10. SSK the first two stitches of each group together and work the rest of the stitches in patt; do this until 12 sts remain. Cut yarn, leaving a tail, and weave the tail through the remaining stitches. Pull tight to close. Weave in ends.

Comments: I have kind of a big head (22.5" around). As a hat with the turned-up brim, the fit is perfect. As a beret it's just a little bit looser than I would have liked. If I made another one for myself, I would CO 4 fewer stitches. If you have a smaller head than I do, I would definitely recommend reducing the initial stitch count by two or three multiples of 4 stitches.

Labels: FOs, Hats

posted by Sami @ 11:59 PM  0 comments

Wednesday, January 10, 2007

Mini-Update

Starlight has become my weekend-only project, as it isn't portable and I get pretty much no chance to knit at home during the week. But I'm still working on it! The body pieces have about 2" more to go before I join the sleeves.

In the meantime, there are hats. Just knitting during my commute and for part of my lunch hour, I can complete a hat in two to five days (depending on gauge and amount of cabling).

Recently completed: Pemaquid hat

In progress: A convertible hat (that wants to be called Nathalie), which can be worn as a hat or as a beret. In black and white variegated Muench Naturwolle, on a #10. I can't find this color any more, and I can barely even find the yarn, but it's a thick-and-thin single ply, so I'm thinking Manos will be an excellent substitute if I want to make more of these.

In the wings:
Three recipe cloches.
1. Super-girly cable-and-lace stitch pattern ("Tilting Ladders" for all you Barbara Walker fans) in green Laines du Nord Cashsilk (color 08). I don't know what's up with the recommended needle size being 8 or 9 for this yarn. It's pretty clearly a DK-weight, and I'm going to swatch on sizes #4 and #5 to figure out which is best. The brim will be 1x1 rib, and I'll probably finish this one with a fancy ribbon for extra girliness.

2. Extra-chunky, cloche version of the Wavelet. In dark grey Misti Alpaca Chunky, on a #11. Brim in 2x2 rib. Finished with a ribbed button band, just like the Moss Cloche.

3. Twisted-stitch pattern (BW's "Wickerwork") in Rowan's Scottish Tweed DK held together with a strand of Kidsilk Haze, on a #7. Brim in 2x2 rib, ribbed button band.

Labels: Hats, Starlight

posted by Sami @ 10:06 AM  1 comments

Saturday, January 06, 2007

... And, First FO of 2007

The Pemaquid hat:
(Color is truest in the closeup photo.)


(Like my new hat model?)

I used 2 skeins of Pemaquid from The Fibre Company, purchased at Webs. Man, I love this yarn. It has the sproinginess and non-itchiness of merino, but it feels even butterier. It's expensive, but for something small like a hat, it is totally worth it.

Needles: Sizes 9 and 10 47" Addi Turbo circulars. I highly recommend Magic Loop for hats in general, but especially for this one, because the decreases are very fast, and it's important to get your hat the right length.

Pattern
With #9 needle, CO 60 stitches. (This fits my 22.5" head, although it also appears to fit my mannequin, who has only a 20.75" head. The moss stitch cloche, by comparison, hangs over her nose. If you still want to adjust, add or subtract a multiple of 4 stitches, and the basic pattern will be the same). Join into a round, and work k2, p2 rib for about an inch. Switch to #10 needle.

Work increase round: (K2, p1, M1, p1) around - 75 stitches (or 5/4 of your CO amount).

Work in Furrow Rib (see below) until hat is the right length, ending on Round 2 of the pattern. What is the right length? Try it on. Placing the bottom where you want it to go (I like my hats to cover my ears, but some people prefer half coverage or even a beanie shape where the ears are not covered at all), the top should come about an inch short of meeting at the top of your head. For me, the right length was just under 8 inches.

Work Decrease rounds:
Round 1: (K2, slip 2 together as if to knit, k1, p2sso) around - 45 stitches total (or 3/4 of your CO amount)
Round 2: K all stitches. When you get to the marker, remove it, k one more stitch, and replace it.
Round 3: (Slip 2 together as if to knit, k1, p2sso) around - 15 stitches (or 1/4 of your CO amount)
Round 4: K all stitches.

Cut yarn, leaving a tail. Thread tail through remaining stitches and pull tight. Weave in ends.

Furrow Rib
Worked in the round over a multiple of 5 stitches.
Slip all stitches purlwise with yarn in back.
Round 1: (Sl 2, k3) around
Round 2: (K2, p3) around
Repear rounds 1 and 2 for pattern.

Labels: FOs, Hats

posted by Sami @ 7:42 AM  3 comments

Friday, January 05, 2007

Last FO of 2006

Here she is, the Moss Cloche:


(Color is truest in the one where you can see the camera.)

This was a Cloche Recipe cloche. I used two skeins of Rowan Big Wool in color Cassis (#24, I think), and 47", size 11 Addi Turbo circular needle. (Side note: I always use Magic Loop for hats, so I can try them on as I go.) I cast on 60 stitches to begin with, and followed the Recipe. For the decreases, I divided the stitches into 5 groups of 12 and SSK'ed the first two stitches of each group on every round. The band is 5 stitches in K1, P1 rib with a chain stitch selvedge (exactly the same as for Glaistig, but without the bobble).

I'm going to have to make another one of these for the store. I can't in good conscience use this one because I have literally been wearing it EVERY DAY. I'm kind of over the spiral decrease thing (it's been a while since I leafed through Knitting Nature), so for version 2 I'll be using the centered double decrease - sl 2 tog as if to k, k1, p2sso - instead. Well, probably. I want to swatch(!) for that first. I like that decrease for stockinette, but I haven't tried it yet for moss.

Labels: FOs, Hats

posted by Sami @ 7:36 PM  2 comments

Tuesday, January 02, 2007

Random Thoughts

Firstly, Happy New Year, everyone!

Since I'm back at work this week, I'm a-cheatin' on Starlight. It's too big to lug around (back/fronts now about 2/3 of the way to the armhole shaping), so I've ripped back my Pemaquid hat to before the decreases and plan on finishing that up in the next couple of days. Hopefully before Friday, because that's the only day I really get to make proper posts with photos (The TyrantWibbles does NOT like me using the computer and posts w/photos take forever).

I will also post pics Friday of my final FO of 2006 (another hat, of course). I finished the knitting on this one back in August, but I didn't have the right button. I've been wearing it anyway, using one of the buttons I originally bought for the as-yet-unstarted Asymmetrical Cardigan. I bought a button for this hat a couple of months ago, but had been too lazy to sew it on until last Saturday.

The last picture I'll post Friday is of my sassy new face. I suppose that needs some explanation. This year, rather than making a bunch of resolutions that don't last past January, I decided to make only one resolution. My resolution for 2007 is to at least pretend that I give a crap what I look like. I mean, I dress okay (although this is more because I like clothes than because I care what I look like), I shower, I tweeze my eyebrows, and shave what needs shaving and all. BUT... I only cut my hair about once every 5-6 months (the time it takes for a chin-length bob to grow to my shoulders), and I wear virtually no makeup (pretty much just concealer and lip balm). So here I am, in my new chin-length layered bob, which I will maintain properly, and two(!) shades of eye shadow, eyeliner, mascara, lipstick, tinted moisturizer and powder. No blush. I draw the line at blush!

Labels: Hats, Starlight

posted by Sami @ 1:07 PM  2 comments

Thursday, December 28, 2006

Mini-Update

I've been completely faithful to Starlight since I started it - not only have I not started any new projects, I haven't even touched any of my other WIP's. This is like a minor miracle for me, and says what an enjoyable knit Starlight has turned out to be.

The sleeves have been worked up to the point of the cap shaping, and are waiting for the body to catch up so the set-in sleeve can be worked seamlessly a la Eunny. I am working the back and fronts simultaneously (but as three separate pieces). As of now they are just under 1/3 of the way to the armhole shaping. There will be a proper WIP post (with photos) on Friday.

An answer to Glaistig's very kind coment on my last post: I decided to wait an extra year before showing the hats to the Candy Plum owner. This will give me time to get a proper collection knitted up, plus get a real ("real" meaning not hosted for free) website working, business cards, etc. I'm (probably) not going to design any hats this year - instead I'll focus on knitting up hats I've already designed, a few of each in different colors, for the store. Also perfecting the finishing, refining some designs, things like that. I hope to have everything ready to show Candy Plum before the 2007 fall season starts.

The hat business is my main knitting goal for 2007. Other than that, I want to finish Starlight (my somewhat unambitious goal on that one is to be able to wear it by Valentine's Day), restart and finish Demi, and to make something LARGE - either a coat or a blanket. I think I'm going to need to take a Fair Isle class before starting seriously on my Mom's sweater. Hopefully I'll get a chance to do that next year too.

Labels: Hats, Starlight

posted by Sami @ 10:28 AM  1 comments

Thursday, December 21, 2006

In the Spirit of EZ

I didn't join Zimmermania, since I've got too much on my plate right now, but I have been ogling all the awesome projects. I really like EZ's knitting philosophy, especially the idea of using "recipes" instead of set patterns. So here is my generic cloche recipe.

First of all, why a cloche?
1. They're feminine (cute or elegant, depending on your choice of yarn, color and finishing), and flatter most face shapes.
2. You can't ignore gauge completely, but you don't have to obsess over it to get a good fit. A cloche is a good surprise gift for a woman, since you don't need to get her head measurement first.
3. There is no need to increase between the brim and the main body of the hat, so you can use complex stitch patterns without having to worry about the increases blending in nicely. Or about choosing a separate stitch pattern for the brim.

The recipe:
1. Choose your stitch pattern. Knit a gauge swatch. (Disclaimer: Only once have I ever actually done the swatch - for Glaistig, since that was for publication. However, I have had to rip out and start over on occasion, so maybe I should swatch more often.) Since gauge is not terribly crucial, don't worry about using any of those crazy techniques for knitting your swatch in the round. Just knit it flat. If it's a little off, it won't matter.
2. Measure your swatch. If it's ribbing or some other stretchy stitch pattern, pin the swatch out to a comfortable stretch before measuring. Figure out how many stitches to the inch you're getting.
3. Cast on enough stitches for the size of your head plus one-half to one inch. Add an extra inch or so if you're using an inelastic yarn like cotton or silk. Adjust (upward, always upward) if necessary to get the correct multiple for your stitch pattern. If it's a gift and you don't know the recipient's head size, just go for about 24". A cloche can be waaaaaay too big and still look good. But it won't look good if it's too small.
4. Join into a round and start knitting. If your stitch pattern is simple and non-curling (seed, moss, rib) just start off in pattern. For stockinette, or any other curling pattern, I recommend a stockinette hem. After 1.5 to 2 inches, work an eyelet round. Space 6 to 12 eyelets (made with a YO followed by working 2 stitches together) evenly around the circumference. If you are knitting a cabled hat, don't start cabling until after the eyelet round - the brim will flare out a bit, which is good. If the cables are on a ribbed background, do a ribbed brim. If on a stockinette background, do a stockinette hem.
5. After the eyelet round, continue knitting in your chosen stitch pattern until it's time to start the decreases (hat will measure about 8" in length at this point).
6. Figure out how many stitches to decrease each round. For garter stitch, 4 stitches. For stockinette, seed and moss, 5 stitches. For rib, 6 stitches. For cables, it depends on the density of the cabling. 8 to 12 is usually about right, but it can be much higher if the cabling is very dense (Diminishing Braids, for example). Work your decrease rounds until you have 4-16 stitches left (less for bulkier yarn, more for thinner yarn) and close up your hat.
7. Now, for the finishing. This is where you are able to get that perfect fit, which is why you don't really have to worry about it when you're knitting the hat. The simplest thing (and the best choice if it's a gift and you're unsure of her measurements) is to just thread a nice piece of ribbon through the eyelets, and tie it in a bow. You could also make an i-cord bow, as Meg did. Or, you could knit a ribbed band. 5 stitches in 1x1 rib generally fits nicely through the eyelets. Make a yarnover buttonhole at one end of the band, and either make a bobble on the other end or sew on a button. The knitted band should fit around your head with 1 or 2 inches of overlap when comfortably stretched.

Ta da!

Now for Starlight news. I've been knitting! The sleeves are now about an inch short of starting the cap shaping. I've also cast on for the back, and have about 3" of that worked. I've decided to copy the great Eunny and work the sleeve cap together with the body pieces rather than seaming them together afterward. I'm still working the body flat, though, and working the back and two fronts as three separate pieces up to the armhole shaping. So when I'm done knitting, I'll have a big flat blob to lay out and block. Then I can sew the side and sleeve seams, and after that work my edgings.

Labels: Hats, Starlight

posted by Sami @ 10:03 AM  1 comments

Saturday, November 18, 2006

YAAC (Yet Another Cabled Cloche)*

I call this one Meandering Lattice:


Yarn: Noro Cash Iroha, 2 skeins. I lost the ball bands, so I can't remember what color it is, but it's eighty-something. Beige. Needles: Size 8, 16" Addi circular (used 2 circs for the crown). Gauge is not terribly crucial - the hat fits very loosely without the ribbon. Any yarn that knits up on a 7-9 needle is probably fine.

Pattern:
Cast on 120 sts. Work 9 rounds in k2, p2 rib, starting and ending with k1. Work eyelet round: *K1, p2, k2, p2, k1, p1, YO, k1, repeat from * around. Work Meandering Lattice pattern (see below) until hat measures 7" tall, then decrease. For the decreases, I just divided the sts into 10 groups of 12. Each round, I SSK'ed the first 2 sts of each group until there were 10 sts left, then closed it up. I'm using a ribbon to fit the hat, but I have 1/3 to 1/2 skein of yarn left, so I'm working on a Glaistig-style knitted band to use as an alternative. (Unlike the Glaistig, band, though, I am using double-knitting instead of ribbing, and I plan to use an actual button instead of a bobble.)

Meandering Lattice (round):
Worked over a multiple of 12 sts.
Rounds 1-3: K1, (p2, k2) to last 3 sts, p2, k1.
Round 4: *Sl 4 sts to cn and hold to front, (k1, p2, k1) from ln, (k1, p2, k1) from cn, (k1, p2, k1), repeat from * until you reach marker. Remove marker, k1, p2, k2, p1, replace marker. Round now begins at new marker position.
Rounds 5-8: P1, (k2, p2) to last 3 sts, k2, p1.
Round 9: *Sl 4 sts to cn and hold to front, (p1, k2, p1) from ln, (p1, k2, p1) from cn, (p1, k2, p1), repeat from * until you reach marker. Remove marker, p1, k2, p2, k1, replace marker. Round now begins at new marker position.
Round 10: Same as round 1.
Repeat rounds 1-10 for pattern.

Note that Meandering Lattice is reversible, so a matching scarf can be made. Here is the pattern (much easier, actually) for flat knitting:

Meandering Lattice (flat):
Worked over a multiple of 12 sts + 2.
Rows 1-4: K1, (p2, k2) to last st, p1.
Row 5: *Sl 4 sts to cn and hold to front, (k1, p2, k1) from ln, (k1, p2, k1) from cn, (k1, p2, k1), repeat from * until 2 sts remain, k1, p1.
Rpepeat rows 1-5 for pattern.

*This title is actually hilarious, if you happen to subscribe to the Nethack usenet group.

ETA: There is a mistake in the eyelet round of the pattern (thanks to the commenter who pointed this out!):

Instead of: *K1, p2, k2, p2, k1, p1, YO, k1, repeat from * around, the pattern should read: *K1, p2, k2, p2, k1, p1, YO, k2 tog, repeat from * around.

Labels: Hats

posted by Sami @ 3:41 PM  8 comments

Thursday, August 24, 2006

Hat Hole


I knit pretty much all my hats from the bottom up. Why? Because I don't find the bound-off edge stretchy enough for the bottom of a hat. I also don't like to knit "soul-crushers" (my term for any knit where the rows/rounds acquire more stitches as you get farther along), with the exception of the OSW which does not bother me for some reason.

Many people don't like knitting hats from the bottom up, however, because of the dreaded "hat hole" (pictured above). You don't have to get hat hole! The following technique occured to me when I made my very first hat, and I'm really surprised I haven't seen it anywhere else. Once you've drawn your yarn tail through the remaining stitches and pulled tight, drop the needle down the central hole so the tail is on the inside of the hat. Now look closely at the hole. There's the hole, then a round of relatively loose stitches around it, followed by a round of "normal" stitches. Poke the needle up through one of the normal stitches, just beyond the edge of the looser stitches. Bring the needle down again, diametrically opposite of where you poked it up. You have just made a line across the hole. Pull the yarn tight. Now make another line across the hole, the same as the first one but perpendicular to it. Pull tight again. You've made a plus sign covering the hole, which is now virtually invisible. The yarn tail is on the inside of the hat. Turn the hat inside out and weave in the tail. Ta da!

Labels: Hats

posted by Sami @ 3:21 PM  3 comments

Monday, June 19, 2006

Successes!

I needed a quick success this past weekend, firstly as a break from the Big Projects I'm working on, and secondly to take my mind off Friday's crushing defeat. The crushing defeat involved an experiment for a hat (of course) with a unique construction. I didn't get to see the results of the experiment; I'll have to retry as soon as I muster the resolve to rip out the disaster. The disaster being: 324 stitches. K1, p1 ribbing in the round. Over TWENTY rows in before I notice the twist.

Anyway, on to the good stuff. I decided to try out a quick and easy hat design that's been floating around in my head, a Barbara Walker stitch pattern in a bulky yarn. I loved how it came out, so I decided to share the pattern here. E-mail me if you make one; I'd love to see how it turns out!


Wavelet Hat
3 skeins Karabella Aurora Bulky in color #22. (That's right, 3 skeins. This yarn has the worst yardage EVER!) 100% merino wool, 54 yds/50 g per ball.
47" Addi Turbo circulars in US sizes 9 and 10.5 (I use the Magic Loop technique. Obviously you can use 16" circulars, and a spare circ or set of dpn's in size 10.5 if you prefer).
Gauge: 20 sts and 23 rows in Wavelet pattern, knit circularly with larger needle

Wavelet Pattern knit circularly (this is my name for the stitch pattern; I can't remember what BW called it but I think it might be "Little Cables" or "Cable Fabric" or something like that):
Multiple of 6 sts
Rounds 1-2: Knit.
Round 3: *Slip 2 sts to cable needle (cn) and hold to front, k2 from left needle, k2 from cn, k2, repeat from * around.
Rounds 4-6: Knit.
Round 7: *K2, Slip 2 sts to cn and hold to back, k2 from left needle, k2 from cn, repeat from * around.
Round 8: Knit.
Repeat rounds 1-8 for pattern.

Hat:
With US 9, CO 56 sts. Join into round, being careful not to twist. Work 5 rounds in k2, p2 ribbing. Switch to US 10.5 and work one more round in rib pattern.
Work increase round: *K4, m1, k3, m1, repeat from * around. [72 sts total.]
Work 32 rounds (4 full repeats) in Wavelet pattern.
Work decrease rounds:
1. (K10, k2 tog) around [66 sts total].
2. (K9, k2 tog) around [60 sts total].
3. (Slip 2 sts to cn and hold to front, k2 from left needle, k2 from cn, k4, k2 tog) around [54 sts total].
4. (K7, k2 tog) around [48 sts total].
5. (K6, k2 tog) around [42 sts total].
6. (K5, k2 tog) around [36 sts total].
7. (K4, k2 tog) around [30 sts total].
8. (K3, k2 tog) around [24 sts total].
9. (K2, k2 tog) around [18 sts total].
10. (K1, k2 tog) around [12 sts total].
11. (k2 tog) around [6 sts total].
Cut yarn and thread onto tapestry needle. Pull yarn tail through remaining sts and pull to close. Weave in ends.

Sizing notes:
1. The hat will stretch. Right after knitting, it was 8.75" tall and only 15" in circumference. It was uncomfortably tight when I first put it on. After wearing it for 20 minutes, the height stayed the same but the unstretched circumference had increased to 18" and the hat was comfortable to wear. I wore it on and off for an additional 3 hours, but there was no more stretching.

2. I have a biggish head (22.5") and this hat fits very snugly, which is how I like it. Kids don't usually like tight hats, so you can probably use the same stitch count for a kid size, and just make the hat shorter by working the Wavelet pattern for 24 rounds instead of 32. If you have a superbig head, or just a big head but like a looser fit, try adding 4 (or 8) stitches to the ribbing and 6 (or 12) to the main body. You will need to redo the math for the increase round so the increases occur evenly around the hat. Also, there will be 1 (or 2) more decrease rounds to work. I can't guarantee that the cool flower effect will be preserved, but it will probably be similar enough.

Labels: Hats

posted by Sami @ 11:46 AM  8 comments