Delinquent Croissant

This sentence no verb.

About Me

My Photo
Name: Sami
Location: New York, New York, United States

View my complete profile

Archives

  • September 2005
  • October 2005
  • November 2005
  • December 2005
  • January 2006
  • May 2006
  • June 2006
  • July 2006
  • August 2006
  • October 2006
  • November 2006
  • December 2006
  • January 2007
  • February 2007
  • March 2007

BLOGS I READ

Click here to see my blogroll

KNITTERLY PUBLICATIONS

Knitty
The Anti-Craft
MagKnits
Spun Magazine

FREE GOODIES

Kyoto Fair Isle hat
Nathalie convertible hat/beret
Pemaquid Hat
Moss Stitch Cloche in Big Wool
Cloche Recipe
My desktop wallpapers
Meandering Lattice Hat Pattern
Diminishing Braids Hat Pattern
Bobble Thing Hat Pattern
Glaistig Hat Pattern
Wavelet Hat Pattern
Three scarf patterns using Manos

READER KNITS

Meg's Diminishing Braids
Sabine's Glaistig
meegiemoo's Wavelets
Christy's Wavelet
Subhuman Superwoman's Meandering Lattice

Powered by Blogger

Subscribe with Bloglines

Friday, December 29, 2006

Starlight Progress

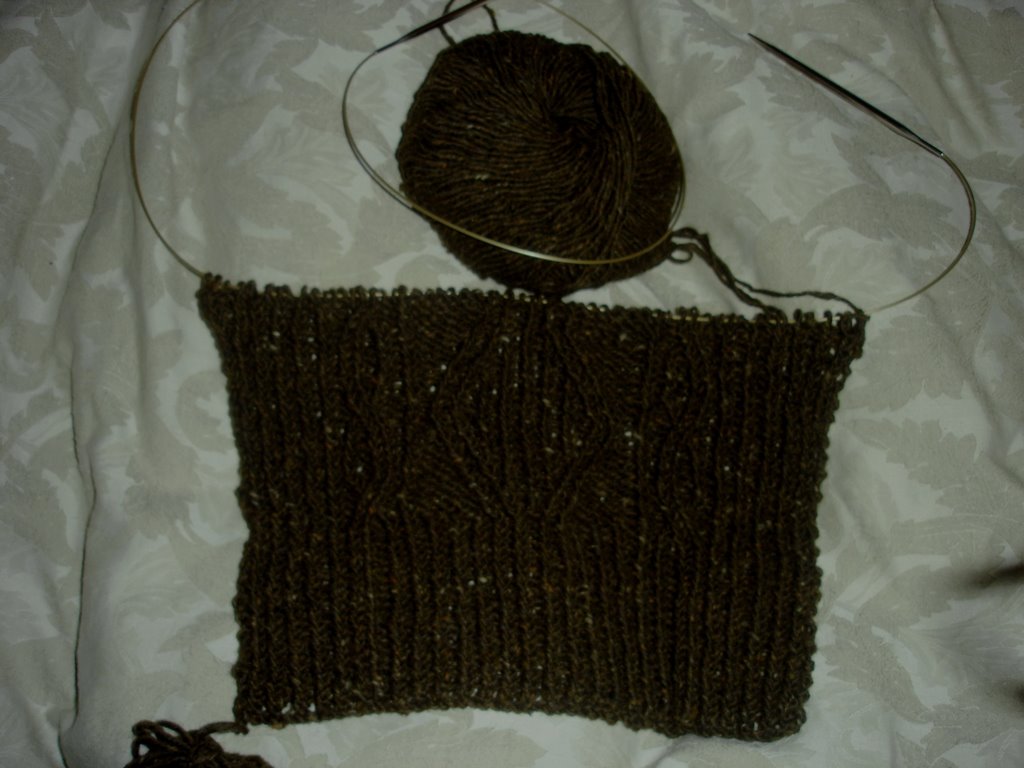
Sleeves, waiting to be shaped together with the body pieces:


Back and fronts:


Closeup of center back, where the cables change directions:


While I knit, I've been thinking about what Eunny said about working a set-in sleeve together with the body. In this post, she says she hopes it will basically involve making "the appropriate decreases on either side of an imaginary seam line between body and sleeve cap." I think there's a little more to it than that. That imaginary seam line bit will work up to the top of the cap, where if the sleeve were being worked separately, you would cast off the remaining 30 stitches all at once. When you reach that point, I'm pretty sure you will have to start using short rows, attaching first one front to half of those 30 sleeve stitches, then the back to the other half, then the same deal for the other sleeve. I think. I've never done this before, and haven't been able to find anything to read about it. I guess we'll see!

Labels: Starlight

posted by Sami @ 5:08 PM  2 comments

Thursday, December 28, 2006

Mini-Update

I've been completely faithful to Starlight since I started it - not only have I not started any new projects, I haven't even touched any of my other WIP's. This is like a minor miracle for me, and says what an enjoyable knit Starlight has turned out to be.

The sleeves have been worked up to the point of the cap shaping, and are waiting for the body to catch up so the set-in sleeve can be worked seamlessly a la Eunny. I am working the back and fronts simultaneously (but as three separate pieces). As of now they are just under 1/3 of the way to the armhole shaping. There will be a proper WIP post (with photos) on Friday.

An answer to Glaistig's very kind coment on my last post: I decided to wait an extra year before showing the hats to the Candy Plum owner. This will give me time to get a proper collection knitted up, plus get a real ("real" meaning not hosted for free) website working, business cards, etc. I'm (probably) not going to design any hats this year - instead I'll focus on knitting up hats I've already designed, a few of each in different colors, for the store. Also perfecting the finishing, refining some designs, things like that. I hope to have everything ready to show Candy Plum before the 2007 fall season starts.

The hat business is my main knitting goal for 2007. Other than that, I want to finish Starlight (my somewhat unambitious goal on that one is to be able to wear it by Valentine's Day), restart and finish Demi, and to make something LARGE - either a coat or a blanket. I think I'm going to need to take a Fair Isle class before starting seriously on my Mom's sweater. Hopefully I'll get a chance to do that next year too.

Labels: Hats, Starlight

posted by Sami @ 10:28 AM  1 comments

Thursday, December 21, 2006

In the Spirit of EZ

I didn't join Zimmermania, since I've got too much on my plate right now, but I have been ogling all the awesome projects. I really like EZ's knitting philosophy, especially the idea of using "recipes" instead of set patterns. So here is my generic cloche recipe.

First of all, why a cloche?
1. They're feminine (cute or elegant, depending on your choice of yarn, color and finishing), and flatter most face shapes.
2. You can't ignore gauge completely, but you don't have to obsess over it to get a good fit. A cloche is a good surprise gift for a woman, since you don't need to get her head measurement first.
3. There is no need to increase between the brim and the main body of the hat, so you can use complex stitch patterns without having to worry about the increases blending in nicely. Or about choosing a separate stitch pattern for the brim.

The recipe:
1. Choose your stitch pattern. Knit a gauge swatch. (Disclaimer: Only once have I ever actually done the swatch - for Glaistig, since that was for publication. However, I have had to rip out and start over on occasion, so maybe I should swatch more often.) Since gauge is not terribly crucial, don't worry about using any of those crazy techniques for knitting your swatch in the round. Just knit it flat. If it's a little off, it won't matter.
2. Measure your swatch. If it's ribbing or some other stretchy stitch pattern, pin the swatch out to a comfortable stretch before measuring. Figure out how many stitches to the inch you're getting.
3. Cast on enough stitches for the size of your head plus one-half to one inch. Add an extra inch or so if you're using an inelastic yarn like cotton or silk. Adjust (upward, always upward) if necessary to get the correct multiple for your stitch pattern. If it's a gift and you don't know the recipient's head size, just go for about 24". A cloche can be waaaaaay too big and still look good. But it won't look good if it's too small.
4. Join into a round and start knitting. If your stitch pattern is simple and non-curling (seed, moss, rib) just start off in pattern. For stockinette, or any other curling pattern, I recommend a stockinette hem. After 1.5 to 2 inches, work an eyelet round. Space 6 to 12 eyelets (made with a YO followed by working 2 stitches together) evenly around the circumference. If you are knitting a cabled hat, don't start cabling until after the eyelet round - the brim will flare out a bit, which is good. If the cables are on a ribbed background, do a ribbed brim. If on a stockinette background, do a stockinette hem.
5. After the eyelet round, continue knitting in your chosen stitch pattern until it's time to start the decreases (hat will measure about 8" in length at this point).
6. Figure out how many stitches to decrease each round. For garter stitch, 4 stitches. For stockinette, seed and moss, 5 stitches. For rib, 6 stitches. For cables, it depends on the density of the cabling. 8 to 12 is usually about right, but it can be much higher if the cabling is very dense (Diminishing Braids, for example). Work your decrease rounds until you have 4-16 stitches left (less for bulkier yarn, more for thinner yarn) and close up your hat.
7. Now, for the finishing. This is where you are able to get that perfect fit, which is why you don't really have to worry about it when you're knitting the hat. The simplest thing (and the best choice if it's a gift and you're unsure of her measurements) is to just thread a nice piece of ribbon through the eyelets, and tie it in a bow. You could also make an i-cord bow, as Meg did. Or, you could knit a ribbed band. 5 stitches in 1x1 rib generally fits nicely through the eyelets. Make a yarnover buttonhole at one end of the band, and either make a bobble on the other end or sew on a button. The knitted band should fit around your head with 1 or 2 inches of overlap when comfortably stretched.

Ta da!

Now for Starlight news. I've been knitting! The sleeves are now about an inch short of starting the cap shaping. I've also cast on for the back, and have about 3" of that worked. I've decided to copy the great Eunny and work the sleeve cap together with the body pieces rather than seaming them together afterward. I'm still working the body flat, though, and working the back and two fronts as three separate pieces up to the armhole shaping. So when I'm done knitting, I'll have a big flat blob to lay out and block. Then I can sew the side and sleeve seams, and after that work my edgings.

Labels: Hats, Starlight

posted by Sami @ 10:03 AM  1 comments

Saturday, December 16, 2006

Starlight

First, good news. Last Sunday I attended a Barbara Kerr finishing workshop at The Point - a birthday gift from my parents. Boy, did I learn a lot. There are some things that it's really difficult to learn from books, and finishing is one of them. Not only did I finally learn how to seam properly, I also learned how to do short-row shaping for sweater shoulders, how to graft in a sleeve, and a bunch of other stuff.

Now, the bad news - I decided to frog my Demi sleeve and start over, this time adding a stockinette stitch to each edge. It will make finishing easier and better looking, and I wasn't so far along (about 2 inches more than in the last photo I posted) that ripping was a disaster.

I haven't actually done the ripping yet, since I have raging ripaphobia. I will stall FOREVER before ripping something out, often completing a project or two between the decision to rip and the actual ripping. (Wondering what happened to my Pemaquid hat? I didn't like the way the decreases were going, so I need to rip back to before I started them - STALL.)

So instead of ripping out the Demi sleeve, I made a scarf and started on Starlight. The scarf is just a simple cartridge-belt rib scarf out of some yarn my parents got me from Argentina - 100% Patagonian wool:

I thought it was variegated, but it turned out to be self-striping:


And this is what I've got so far on Starlight:

The yarn is my birthday Ella Rae Classic. It's a much deeper red than it looks in this picture, about halfway between red and burgundy. I'm going to cut off the pink cast-on yarn at the end, put the live stitches on a needle, and do two more rows of garter stitch and a picot bind-off for edging. It should look similar enough to the edging in the pattern, which is knitted separately and then sewn on.

I'm working both sleeves at once, which is what I'm going to do on Demi when I get around to restarting it. The markers are just there to help me remember which direction I'm working in - I get distracted when I knit and watch movies at the same time.

I'm not quite getting gauge - 28 stitches and rows to 4" instead of 30 - but I figure a little extra ease and length is probably a good thing, especially since I am not adding extra stitches for hippage and I am making the size for my real chest size (which is significantly smaller than my hip size). I am increasing more frequently on the sleeves, though, since I don't want those to be too long.

Labels: FOs, Starlight

posted by Sami @ 7:09 PM  3 comments

Tuesday, December 12, 2006

I have no knitting progress to show, but I made some new wallpapers


To use as your desktop background: Right-click on the picture of your choice, and choose "Set as Background" from the menu. It should tile over your entire desktop. If it doesn't, right-click on your desktop (I'm assuming Windows here) and choose "Properties" from the menu. On the "Background" tab, set the "Picture Display" item to "Tile."

Please feel free to copy these for your own personal use. No commercial use, please.

(If anyone is interested in the symmetries here, they are - top to bottom - pgg, p4g, pg and pgg.)

posted by Sami @ 12:12 PM  1 comments

Friday, December 08, 2006

Knitiversary

The second anniversary of my learning to knit is approaching, so I thought I’d share the top 10 list of useful tips I’ve assembled over the past two years. The ideas are all mine, but some of them are very simple – bordering on common sense – so I wouldn’t be surprised if they existed elsewhere.

1.Before you knit, WASH YOUR HANDS. Particularly if you are working with light-colored yarn. No, that chocolate stain is not coming out of your cashmere. Sorry.

2.Don’t get hat hole.

3. If you want to make a striped scarf, it may seem like the only choices are (a) weaving in lots of ends, and (b) carrying the colors up one side, which makes the two edges of the scarf different. However, you can use an ODD number of colors, and make the number of rows in each stripe ODD, and colors will be carried up both sides and the edges will look the same. You can also use an even number of colors (but more than just 2) and a combination of odd and even stripe lengths, but this requires some math to make sure that the color you want next is always available and not parked on the other side.

4. My favorite stitch pattern for scarves is still Cartridge Belt Rib (as defined by Barbara Walker, not the Vogue Knitting Stitchionary). It's worked over a multiple of 4 stitches + 1. Every row is the same: Slip the first stitch pwise, then (k2, sl 1 pwise wyif, k1) over the rest of the row. It looks similar to Mistake Rib, but better (in my opinion) since the columns of knit stitches are elongated and stand out more. It's easy to knit, easy to memorize, and unisex. The edges are especially nice due to the double slip stitch selvedge. It's also visually interesting without being (a), a yarn hog, or (b) too interesting for variegated yarns. What more can you ask for? You can also do a two-color version (using the same method as for two-color Brioche stitch - see the Shadow Dance capelet from Wrap Style) where the columns of knit stitches are all MC on one side of the scarf and all CC on the other side.

5. Any all-over cable pattern can be made reversible by doing the cables in a reversible stitch like garter, seed or rib. With 1x1 rib, you usually have to double the size (meaning, for example, a 4x4 cable instead of a 2x2 cable) to make it look good. For instance, the stitch pattern for the Glaistig hat is the same as the one for the Wavelet hat (which I got from one of the Barbara Walker books - I think she calls it Little Cable Fabric), but doubled in size and done in 1x1 rib. Another way to make cable patterns reversible is to have the number of rows in the pattern repeat be odd.

6. Alpaca is insane. I only use it for scarves, because nothing I make from it will stay the same freaking size. I have one scarf that was 65" long after I knitted it, and is now more than 7' long. I also made an alpaca hat for The Wibbles, which fit him for about two days, after which it fit me for a while, before becoming even bigger. Two other hat-unfriendly fabrics are cotton and silk - neither one is elastic enough. The best hat fiber is by far merino wool.

7. The recommended gauge on the ball band is not gospel. It's usually pretty reliable if you want to make a sweater/top, but I would go down 1 or 2 needle sizes for hats and socks, and up a needle size for scarves.

8. Don't expect to do much knitting around a child between 9 months and 2 years of age, unless said child is asleep. Although perhaps I am just lacking some mysterious skillz, since lots of knitters have cats and still seem to manage not to get their projects destroyed.

9. Don't try to be fancy all the time. Some yarns show texture well, some don't. Some yarns are so interesting (*coughNorocough*) that anything but the plainest stitch pattern detracts from them. Your project will look a lot better if you let the yarn dictate what you do with it, rather than trying to force your fancy idea on the yarn.

10. My favourite yarn for scarves is Manos. Unless there is cabling, two skeins makes a perfectly acceptable-size scarf (5" x 5.5'), and three skeins makes a very generous scarf. I have three staple scarf patterns that I use over and over with this yarn, and I'll share them here.

3-Skein Cartridge Belt Rib Scarf
Materials: 3 skeins Manos (I like to use 3 subtly different shades of the same color), size 10.5 needles. (Scarf will be 7-8" wide, depending on your gauge, and probably over 6' long.)
Scarf: Cast on 33 stitches with Color A. *Work 1 row Cartridge Belt Rib with Color B. Work 1 row Cartridge Belt Rib with Color C. Work 1 row Cartridge Belt Rib with Color A. Carry unused colors up the sides. Repeat from * until you run out of yarn (save some for fringe, if desired) or reach desired scarf length, ending with color C. Bind off with Color A. Attach fringe if desired.

Giant Cable Scarf
Materials: 4 skeins Manos in the same color. Size 10.5 needles. Spare 16" circular needle in size 10.5 to use as a cable needle (trust me, there is no other way to do a cable this huge).
Giant Cable Pattern (over 40 stitches):
Rows 1-22: (K1, p1) across.
Row 23: (K1, p1) twice, slip 16 sts onto "cable" needle, (k1, p1) 8 times from left needle, (k1, p1) 8 times from "cable" needle, (k1, p1) twice.
Repeat rows 1-23 for pattern.
Scarf:
Cast on 42 stitches (I prefer the alternate cable cast-on). Keep the first and last stitch of each row as a selvedge stitch (slip 1st st pwise, k last st), and work center 40 sts in Giant Cable pattern. Work until you run out of yarn or achieve desired length (save some yarn for fringe - this scarf looks funny without it), ending on row 19. BO all sts in pattern. Attach fringe.

Fibonacci Stripe Dr. Who Scarf
Materials: 4 skeins Manos in coordinating colors, size 10.5 needles.
Scarf: Use alternate cable cast-on (25 to 35 stitches, depending on desired width) and work in 1x1 rib throughout. Alternate colors in order A, B, C, D throughout. Alternate #rows in each stripe in order 3, 5, 8, 3, 13, 8, 21, 1, 2, 13, 1, 34, 21, 5, 2 throughout. Carry unused colors up the sides. Work until you run out of yarn (save some for fringe, if desired) or reach desired scarf length. Attach fringe if desired.

A note on fringe: I have always liked Julia's idea for fringe (just about the middle of the way down the page) the best.

posted by Sami @ 1:06 PM  4 comments

Tuesday, December 05, 2006

In Which Martin Storey Both Disappoints Me And Makes Me Feel Better About Myself

Last night I received "Classic Style" and "Classic Cafe" in the mail. I ordered these from Purl Soho. I love Purl - the contents of the package are always lovingly wrapped in tissue and include a hand-written thank-you note.

First, the feeling better part. Check out Melody. That button band pulls up at the bottom exactly the way the one on my Silk Garden sweater does! So perhaps it wasn't my fault? Do all knitted-on ribbed button bands do this? Or does Rowan just have crappy test knitters?

Now, the disappointment: Starlight. The first problem is the ribbed waist - see how it starts and ends higher up on the model's left than it does on the right? Of course, maybe that's not Martin Storey's fault - it could just be the photo, or perhaps the aforementioned crappy test knitters. The second problem I totally consider a design flaw. The cabling is C4B throughout, when I think one half should be C4F and the other C4B, to make it symmetrical. Because the neckline is slanted, and symmetrical, but the cables are not symmetrical, the way the cables blend into the neckline is different on each side and looks WEIRD.

I don't mean to rag on Martin Storey. I really like his designs, and other than Starlight the sweaters in both books rock. And I still like Starlight - in fact it's going to be my next big project after Demi. (No, I haven't forgotten about my mom's sweater. I'll be doing that at the same time. I'm still working on the hat/swatch.) (Plus, it's not like I'm finishing Demi any time soon. I've got about 2" more sleeve now, than in the photo from my last post.)

But I will make the cables symmetrical, and continue the cable pattern up through the waist instead of doing that ribbing. Also I will do the trim differently. I like how it looks, but the idea of knitting a long trim like that and then sewing it on just makes me want to fall off my chair and laugh myself to death. I'll try to crochet (directly on) something that looks similar.

Labels: Starlight

posted by Sami @ 4:14 PM  1 comments

Saturday, December 02, 2006

Earn more sessions by sleeving.


I finally cast on for Demi. I'm omitting the bobbles and just continuing the twisted rib through the whole diamond. Hopefully I'll finish it before it gets too warm to wear it!

Labels: Demi

posted by Sami @ 7:19 PM  1 comments